案例详细说明linux下多个mysql5.7.19(tar.gz)安装图文详细教程
环境:centos 6.5
1-下载
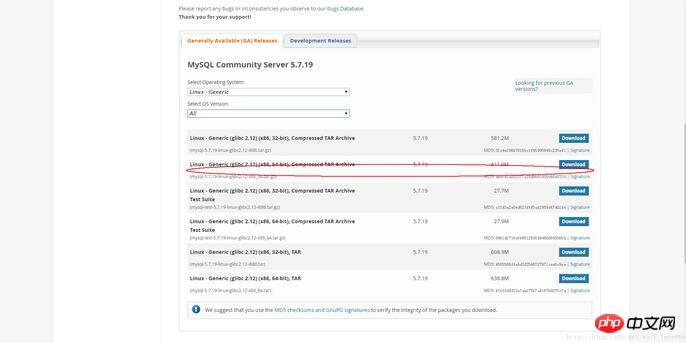
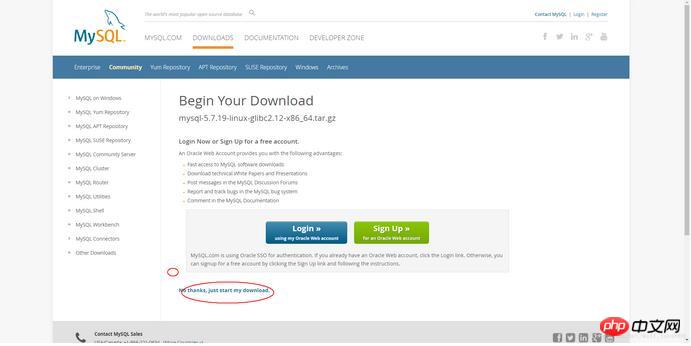
2-跳过登陆
3-1安装多个数据库需要配置自己的my.cnf,如果只安装一个,系统没有安装过直接这个命令就可以
shell> groupadd mysql
shell> useradd -r -g mysql -s /bin/false mysql
shell> cd /usr/local
shell> tar zxvf /path/to/mysql-VERSION-OS.tar.gz
shell> ln -s full-path-to-mysql-VERSION-OS mysql
shell> cd mysql
shell> mkdir mysql-files
查看下有没有data目录如果没有的话增加个命令(mkdir data)
shell> chmod 750 mysql-files
shell> chown -R mysql .
shell> chgrp -R mysql .
shell> bin/mysql_install_db --user=mysql # MySQL 5.7.5
shell> bin/mysqld --initialize --user=mysql # MySQL 5.7.6 and up
shell> bin/mysql_ssl_rsa_setup # MySQL 5.7.6 and up
shell> chown -R root .
shell> chown -R mysql data mysql-files
shell> bin/mysqld_safe --user=mysql &
# Next command is optional
shell> cp support-files/mysql.server /etc/init.d/mysql.server
安装好了就可以直接跳到登陆 步骤5
下面说安装多个mysql情况:
3-2安装多个数据库需要安照如下命令:
1-增加配置文件 my.cnf (在mysql目录下命令touch my.cnf):
下面配置文件可以直接使用粘贴复制进去
然后创建log文件 /xcxyz/log/mysql/error.log
[mysqld]
basedir= /usr/local/mysql-5.7.19-3307
datadir = /usr/local/mysql-5.7.19-3307/data
port = 3307
character-set-server=utf8
server_id = 11
#该socket最好指定,不指定的话默认的话 是使用的默认的socket文件 而且登陆数据库的时候会有我下面的问题
socket = /tmp/mysql3307.sock
log-error = /xcxyz/log/mysql/error.log
pid-file = /usr/local/mysql-5.7.19-3307/data/mysql-5.7.19-3307.pid
2-执行如下命令
2-1增加用户 组 我的用户和组都使用的是mysqlosf这个随意
shell> groupadd mysql
shell> useradd -r -g mysql -s /bin/false mysql
shell> cd /usr/local
shell> tar zxvf /path/to/mysql-VERSION-OS.tar.gz
2-2建立软连接:
shell> ln -s full-path-to-mysql-VERSION-OS mysql
shell> cd mysql
shell> mkdir mysql-files
查看下有没有data目录如果没有的话增加个命令(mkdir data)
2-3授权当前目录:
shell> chmod 750 mysql-files
shell> chown -R mysqlosf .
shell> chgrp -R mysqlosf .
2-4编译
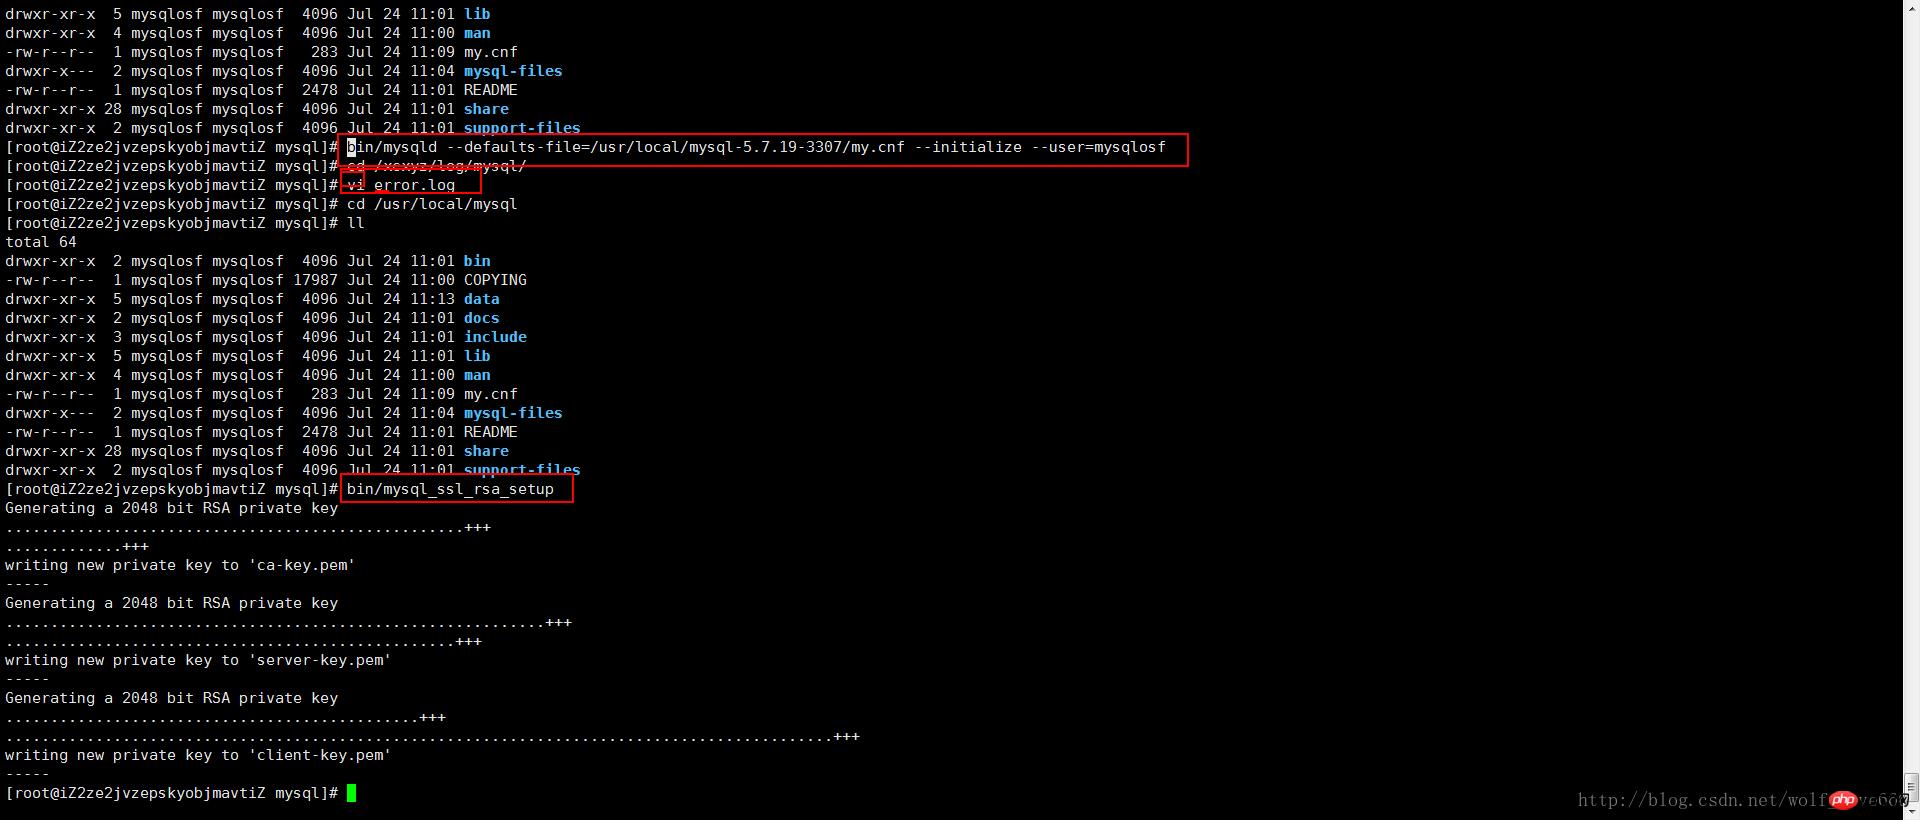
bin/mysqld --defaults-file=/usr/local/full-path-to-mysql-VERSION-OS/my.cnf --initialize --user=mysqlosf
查看日志输出:vi /xcxyz/log/mysql/error.log
2017-07-24T03:13:47.933684Z 0 [Warning] TIMESTAMP with implicit DEFAULT value is deprecated. Please use --explicit_defaults_for_timestamp server option (see documentation for more details).
2017-07-24T03:13:49.979892Z 0 [Warning] InnoDB: New log files created, LSN=45790
2017-07-24T03:13:50.262941Z 0 [Warning] InnoDB: Creating foreign key constraint system tables.
2017-07-24T03:13:50.330756Z 0 [Warning] No existing UUID has been found, so we assume that this is the first time that this server has been started. Generating a new UUID: 1d702294-701e-11e7-98a1-00163e30bbf6.
2017-07-24T03:13:50.340474Z 0 [Warning] Gtid table is not ready to be used. Table 'mysql.gtid_executed' cannot be opened.
2017-07-24T03:13:50.344419Z 1 [Note] A temporary password is generated for root@localhost: jZpgHhigx5>i(特别重要一会初始化密码)
2-5建立密钥
shell> bin/mysql_ssl_rsa_setup --defaults-file=/usr/local/mysql-5.7.19-3307/my.cnf
2-6重新授权分配
shell> chown -R root .
shell> chown -R mysql data mysql-files
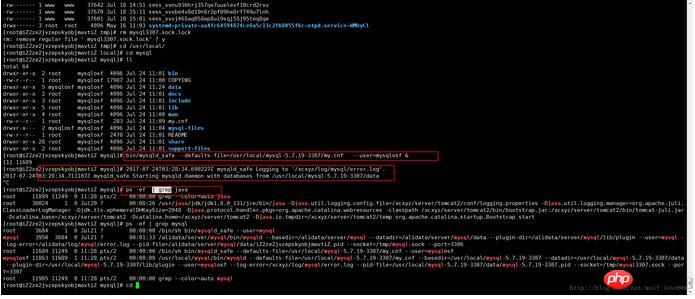
2-7启动后台mysql
bin/mysqld_safe --defaults-file=/usr/local/full-path-to-mysql-VERSION-OS/my.cnf --user=mysqlosf &
Next command is optional
shell> cp support-files/mysql.server /etc/init.d/mysql.server
2-8查看mysql是否启动 ps -ef (北联网教程,专业提供视频软件下载)
……